This short tutorial explains the basics of the AI editor. We will then create an AI that follows the nearest player and attacks enemy. HF!
You will need to know how to use the Map Editor since the AI editor is harder to use.
Please note that the AI editor is an external program for Windows only
Opening the AI editor
As stated above, the AI editor is a standalone executable, you will need to open it every time you want to edit / create a custom AI.
Open a new explorer (WIN + E) and go to the following location: C:\Program Files (x86)\Steam\steamapps\common\Awesomenauts\Data\BehaviourCreator
This path may be different if you moved the folder of the game.

Then double-click BehaviourTreeCreator.exe and the AI editor will open! Magic!
The Editor
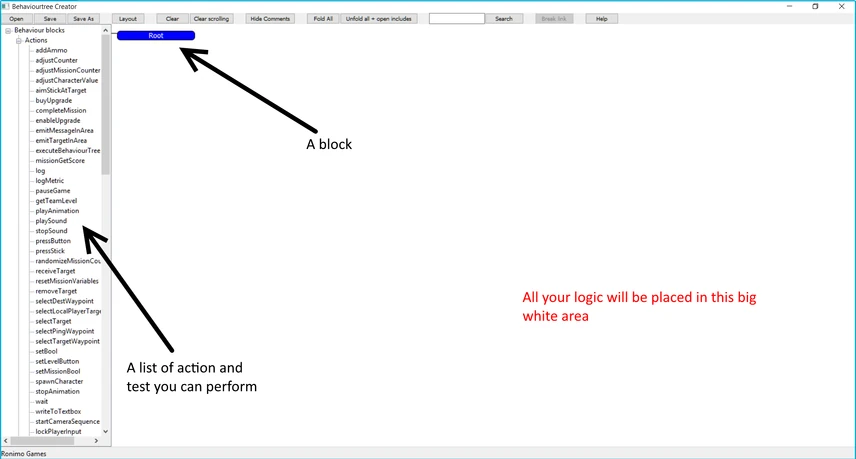
The big white area on the middle is where you will create the logic of your AI. The item list on the left is all the actions and conditions you can check.
Placing your first block
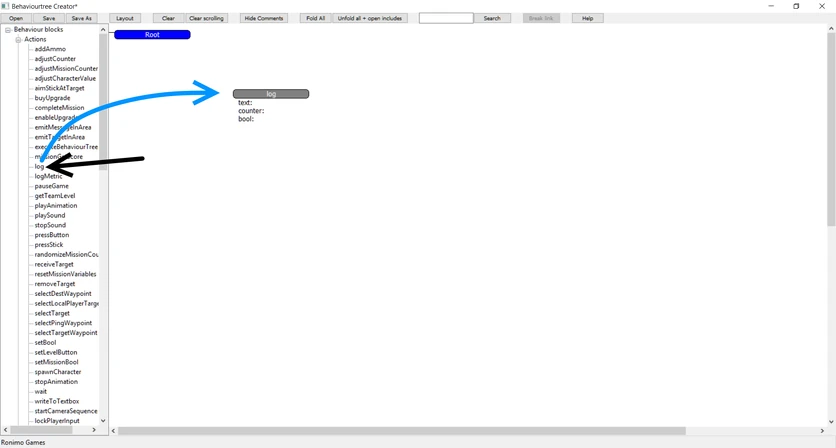
To place a block, drag it from the list on the left and drop it on the white area.
Drag a log block and drop it in the white area. The log block will be like GG7: your best friend. You can use it to print debug text below your bot and trust me this is very helpful when you test a bot.
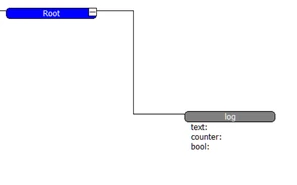
Blocks are useless until they are connected to another block.
Right click the root block and then right click the log block. It should create a connection between the two blocks.
Now we need to set a value to the log block if we actually want to see anything.
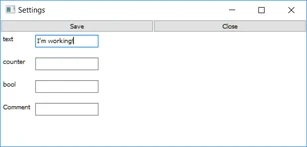
Double-click the log block to open its settings.
A little window will appear. Each blocks have different settings (see AI Editor Blocks to check what they do)
For now, change the first value (put whatever you like) and then click save.
Adding a custom AI to a map
Now we are going to save our beautiful AI in a specific location so we can test it.
We will need to create a mod to test our AI (you can't use custom AI with only a map, you have to create a mod)
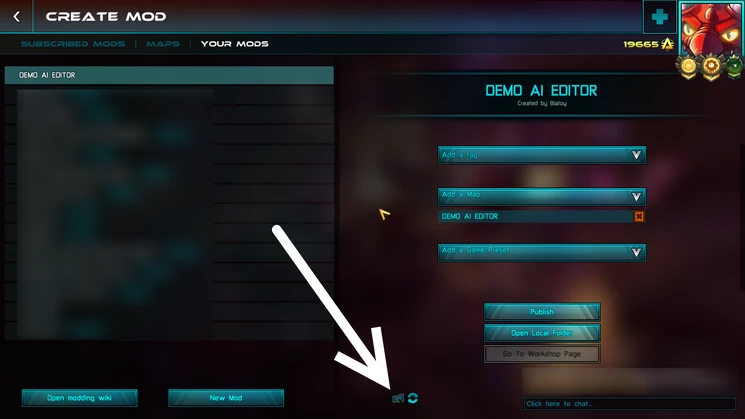
Create a map and put it in a mod. Then click the folder icon to open the explorer where your mod is located.
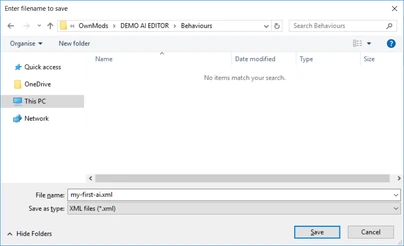
Double-click OwnMods, and on the folder named after your mod. The Behaviours folder is where you will have to save your custom AI file so copy the path in your clipboard.
Now that you know where the Behaviours folder is you can go back to the AI editor.
Once you're in the AI editor hit CTRL-S to save your AI. Save it in the location specified above. Try to give an explicit name because you will need it in the editor.
We're now almost ready to test it! Be sure to hit CTRL-S every time you change something because the AI-editor can crash sometimes.
How custom AI can be used
There's 5 ways to play with the AI you created but you will probably only use the first one right now
- Using CreepSpawnerRepeater, CreepSpawnerOnce, DroidWaveSpawner and setting AiFileName to the name of your file
You may also use the next 4 possibilities in the future (so you can skip it now if you don't want to read)
- By attaching an AI to a player using extraAIToAddToPlayerCharacters in the LevelConfiguration object
- By spawning the AI using the spawnCharacter block
- By naming the AI file AIBotClassName.xml, placing it in the Behaviours folder and ticking the case "Load modded A.I.s for bots" in custom game settings (you don't even need to add a map to your mod if you do this)
- By using the executeBehaviourTree block in the AI editor. You will have to put "(mod) nameOfYourFile" to load it.
Spawning a bot using a CreepSpawner
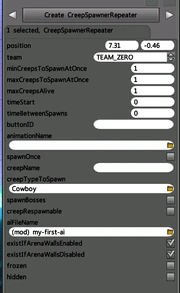
Open the map you created before in the editor and create a CreepSpawnerRepeater:
Set the creepTypeToSpawn to whatever you want, but set aiFileName to the AI you just created and that's it! You first AI will spawn soon.
Testing your AI
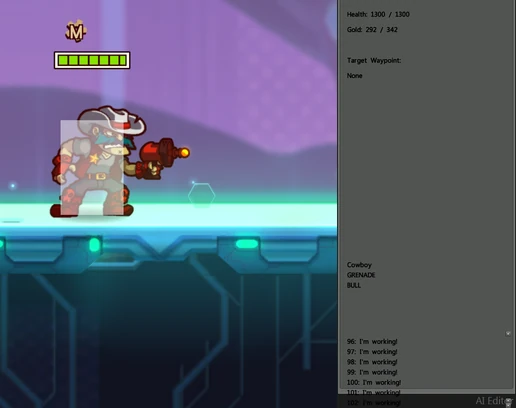
In a first glance, you will think that your beautiful AI does nothing but that's not true! Open the AI debbuger (F4) and select it.
Now you can see the text you wrote using the log block on the bottom right of your screen! This is why the log block is really useful, it gives you the ability to see if the bot does what you want it to do.
Now go back to the AI editor, change the text you set for your log block, don't forget to save and go back to the AI debbuger. Nothing has changed. Why? Because you have to reload the AI and kill it if you want to see any change. To reload your AI press the reload button and then the kill button. ![]()
If you have done everything properly, the logged text should have changed! Note that you can press ALT-F6 to display the log text below the character.
How does the AI editor works
Now that you know how to create an AI, import it and test it, it's time for the hard part!
So, how does the AI editor works?
[WIP]
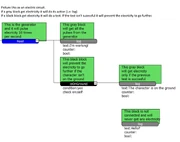
Imagine you have an electric circuit. The root power all the circuit 10 times per second. If the electricity reach an action it will do the action. Use tests to prevent the electricity to go further.
Making a bot that follows you
[WIP]

