Click here to return to the AI Editor main page.

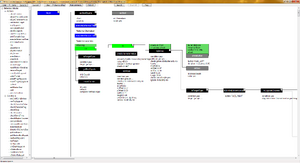
The windows version of the AI Editor showing Leon Chameleon computer AI.
The AI Editor was first released as part of the beta for patch 2.5 and is now part of the full release of the game. The tool allows players to create their own bots and use them in custom games. This is a more simplified version of the AI Editor that was in an unfulfilled stretch goal in the Awesomenauts: Starstorm Expansion Kickstarter.
Below is a reference guide to the many functions of the Editor. This reference is a work in progress and could use a lot of help.
Creating your own custom AIs[ | ]
The AI Editor is currently only available for Windows. However, it comes installed with Mac and Linux and can be run on them using Wine.
To create custom AIs, open the behaviour editor, which can be found in this folder: Awesomenauts\Data\BehaviourCreator\BehaviourTreeCreator.exe
The basic idea is that you combine Conditions and Actions. Shooting, jumping and using skills are done using PressButton with the FACE_* buttons. Walking is done using PressStick.
Execution begins at the Root node, so you need to connect your first blocks to that.
Conditions can be connected using an IF-connector and using an ELSE-connector. If a condition is true, all the IF-connections are executed. If a condition is false, all the ELSE-connections are executed.
AIs update only 10 times per second. This saves a lot of performance and is still fast enough for good reflexes. Keep this in mind when using the PressStick and PressButton actions: to make a character continuously walk, you should keep the button pressed for something like 0.14 seconds per AI tick (well above the 0.1 seconds per AI tick).
To make the character work you must include his gameplay behaviour. To do so add an ExecuteBehaviourTree block and type the className as the fileName, for example "Assassin" or "Dasher".
You can view the existing AIs by opening them using the BehaviourCreator. They are stored here: Awesomenauts\Data\BehaviourCreator\ExampleAIs
Playing with custom AIs[ | ]
You can include AIs in mods by saving them in the “Behaviours” folders of your mod. Such AIs will appear with “(mod)” in front of their name in the map editor.
To override the standard bots with your own AI, create AI files with the classname and put them in the Behaviours folder, and then enable “Load modded AIs for bots” in the Custom Game Settings. The filenames need to start with “AIBot” and can have a description after an underscore, for example “AIBotDasher”, “AIBotCowboy” and “AIBotCowboy_defensive”. You can also create bots for Team Deathmatch this way.
Bots can be part of a map, or can be a separate AI-pack. To create a botpack you must include a Custom Game Settings preset with your mod and players will need to select that preset in their match to use your bots.
You can also attach an additional AI to human players in the map editor using the extraAIToAddToPlayerCharacters setting in the LevelConfiguration object. This is useful if you want to look for custom things on the player (like their health, if they are in a named area, etc.) and do specific action like pressing a level button or setting their health.
The old BehavioursCustom folder is not used anymore, as it's replaced by the above system.
When creating a bot, the game prefers using your own custom AIs, choosing them at random. If all of those are in your team already, it will randomly choose from the AIs that come with the game (Lonestar, Leon, Clunk and Froggy). If you enable allowSameClass in Custom Games, then you can also get teams with several of your own bots. If allowSameClass is set and there are custom bots, then the normal bots will not be used at all.
It is not possible to use custom AIs in Practice mode or in public matches (Battle and Quick Match).
Controls and shortcuts for the BehaviourCreator[ | ]
-Creating blocks: drag them from the list on the left to the big white area on the right .
-Connecting if-blocks: right click on a condition and then right click on another block .
-Connecting else-blocks: right click on a condition, press space, and then right click on another block .
-Connecting sub-conditions to an OR or AND block: right clock on an OR or END block, press space twice, then right click on a condition .
-Deleting a node: hoover over the node and press delete .
-Zooming in/out: Shift + scrollwheel .
-Press F1 for an overview of all shortcuts and keys .
-Press B while hovering over a node in the behaviour creator to set a breakpoint (only works when connected to in-game AI Debugger).
Debugging tools[ | ]
-Press F4 in-game to open the AI Debugger.
-Click a character to see his current state
Buttons top row, from left to right:[ | ]
-Pause button: doh!
-Step button: steps to the next AI tick for the currently selected character.
-Follow button: keeps the camera centred on the selected character.
-Clear log button: clears to log for this character.
-Kill button: kills the currently selected character.
-Reload button: reload all AI files from disc. (Characters will not use the new AI until they are respawned/killed.)
Buttons second row, from left to right:[ | ]
-Step new button: opens the AI for the selected character in a new AI editor for step-by-step debugging .
-Step existing button: same, but in an existing editor.
-NamedAreas button: shows all named areas in the level.
-PathGraph button: shows all path finding nodes in the level.
Keys and shortcuts within AI debugger:[ | ]
-Mousewheel press: move camera around with mouse .
-Arrow keys: move camera around .
-Mousewheel up/down: zoom in/out .
-[] keys: zoom camera in/out .
-Shift+F9: Centre AI Debugger view on player character .
-Alt+F9: Teleport player character to AI Debugger view .
-Ctrl+F9: Reset AI Debugger view to standard zoom.
Keys and shortcuts everywhere in game with modded bots:
-Alt+F6: show AI log messages beneath the character .
-Ctrl+F6: show AI area checks (only for selected character if a character is selected in the F4 editor, otherwise for everyone) (careful with epilepsy: flickers like crazy!).
Class names[ | ]
There's a list of class names here
Additional Tools and Community AIs[ | ]
Several people in the modding community have been hard at work to come up not only with good AIs, but great modding tools as well.
Awesomenauts Settings Manager [Very outdated][ | ]
This was created by JINXOS on the Awesomenauts forums. This allows the user to toy around with the different settings in the awesomenauts game, like attackspeed, projectile sprites, and attacks themselves. Check it out [Awesomenauts Settings Manager]
NautsBuilder to XML Code Converter[ | ]
gmfreaky has created an awesome tool for getting your builds into the AI Editor -- the easy way. Check it out here: [NautsBuilder to Code Converter]
Community Custom AI List[ | ]
DarkDXZ has made a thread compiling great AIs made by the modding community.
Questions?[ | ]
You can post questions in the official [subforum]. Short questions can go directly into the [Questions sticky].
If you feel anything should be added, add it yourself (within reason of course) or let LordValkyrie or Firestix on the Awesomenauts forum know.
There's also an unofficial discord server where you can ask your questions related to the AI and map editor.
