Click here to return to the Map Editor main page.
This short tutorial explains the basics of the map editor. Enjoy! ^_^
[ | ]
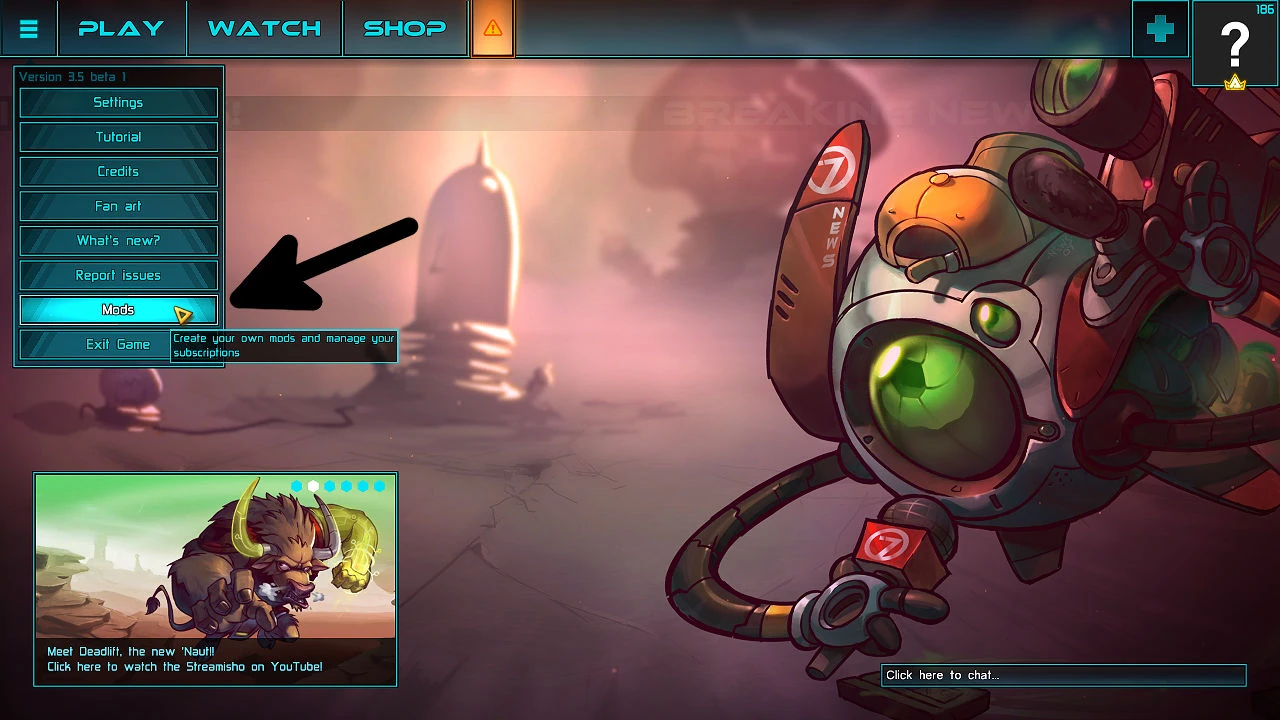
Click the Mods button in the main menu.
Create a map[ | ]
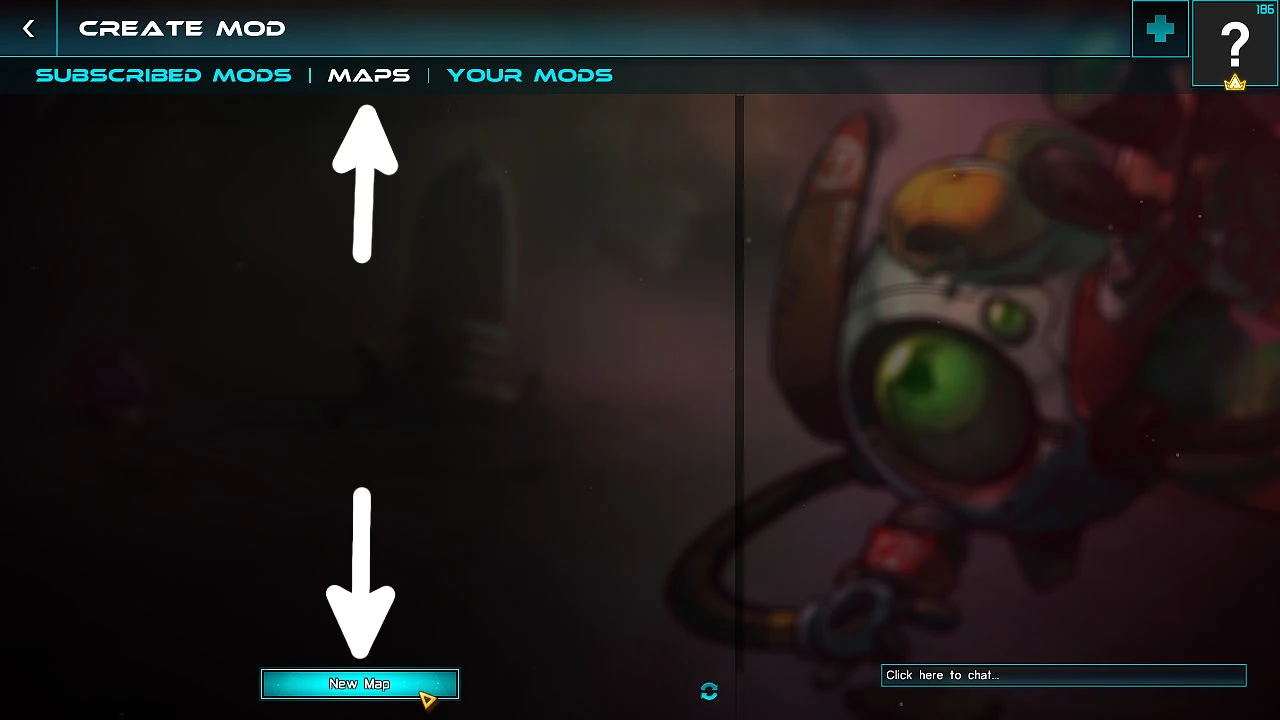
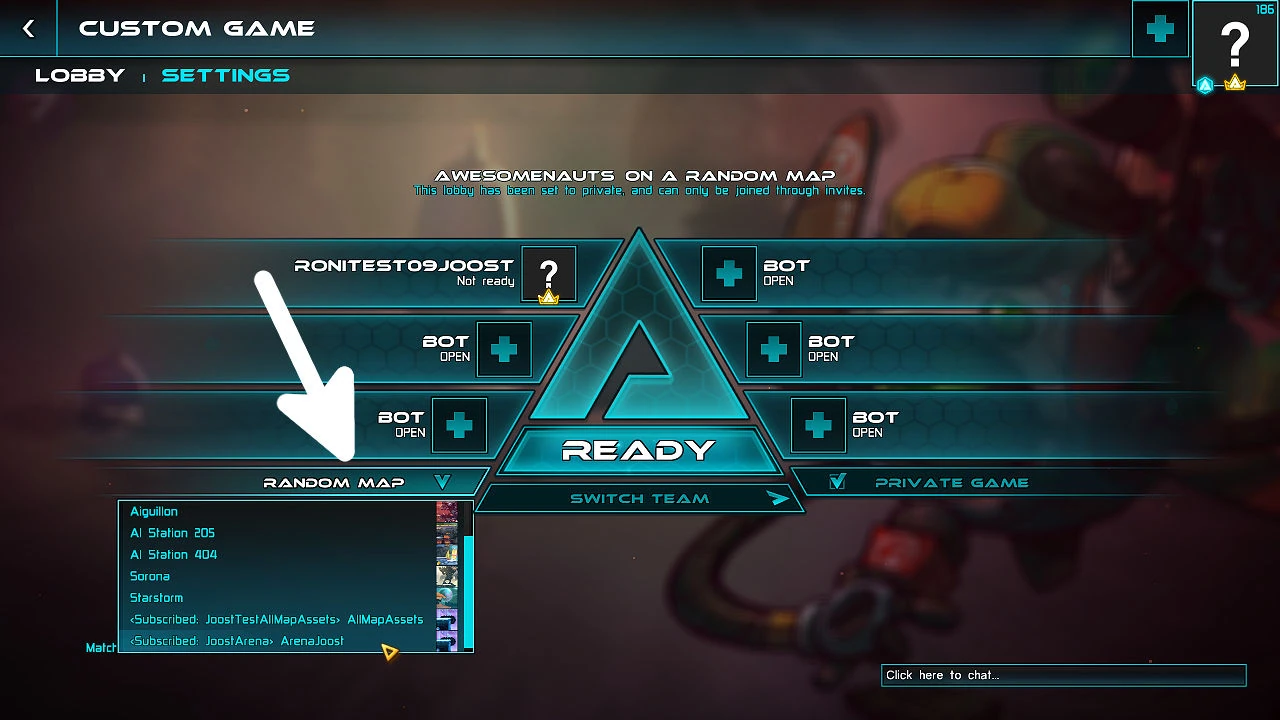
Go to the Maps tab and click New Map.
Set map name and template[ | ]
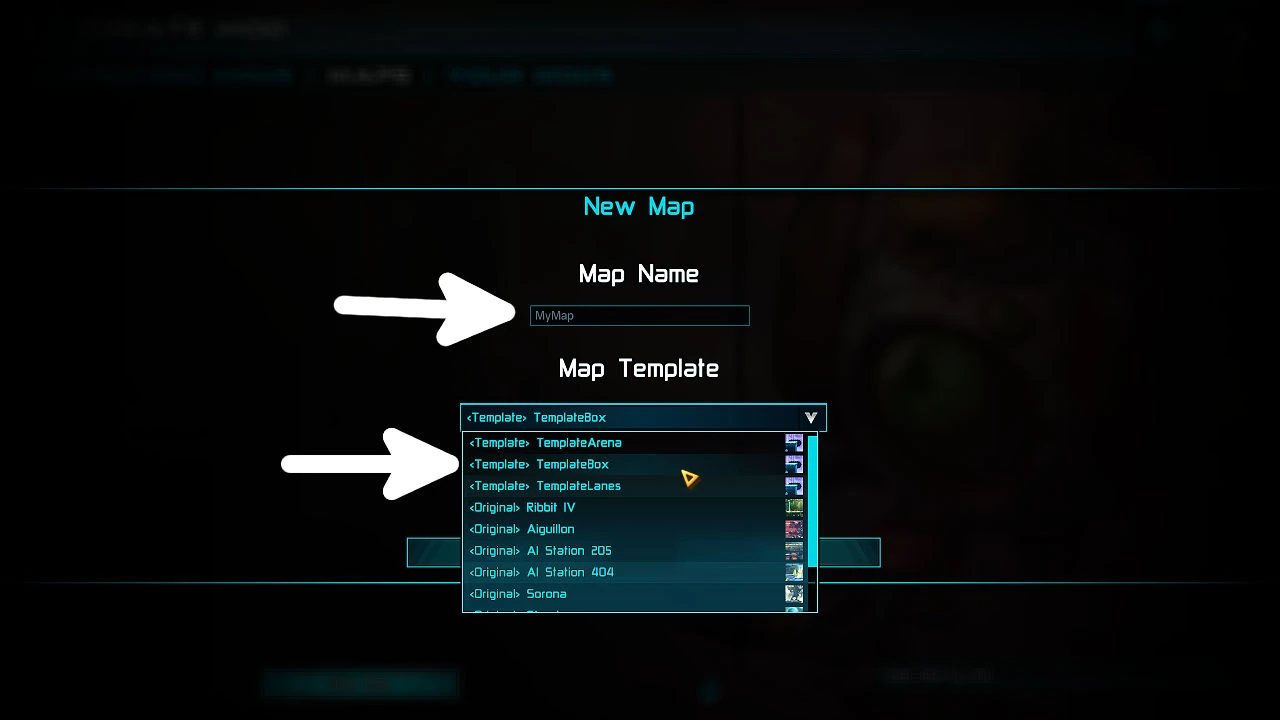
Type the name of your map and then select the map template you want to base your map on. You can copy one of the existing maps, or use three simple templates. In this case we're going to use the most basic template, called TemplateBox.
Press play/edit[ | ]
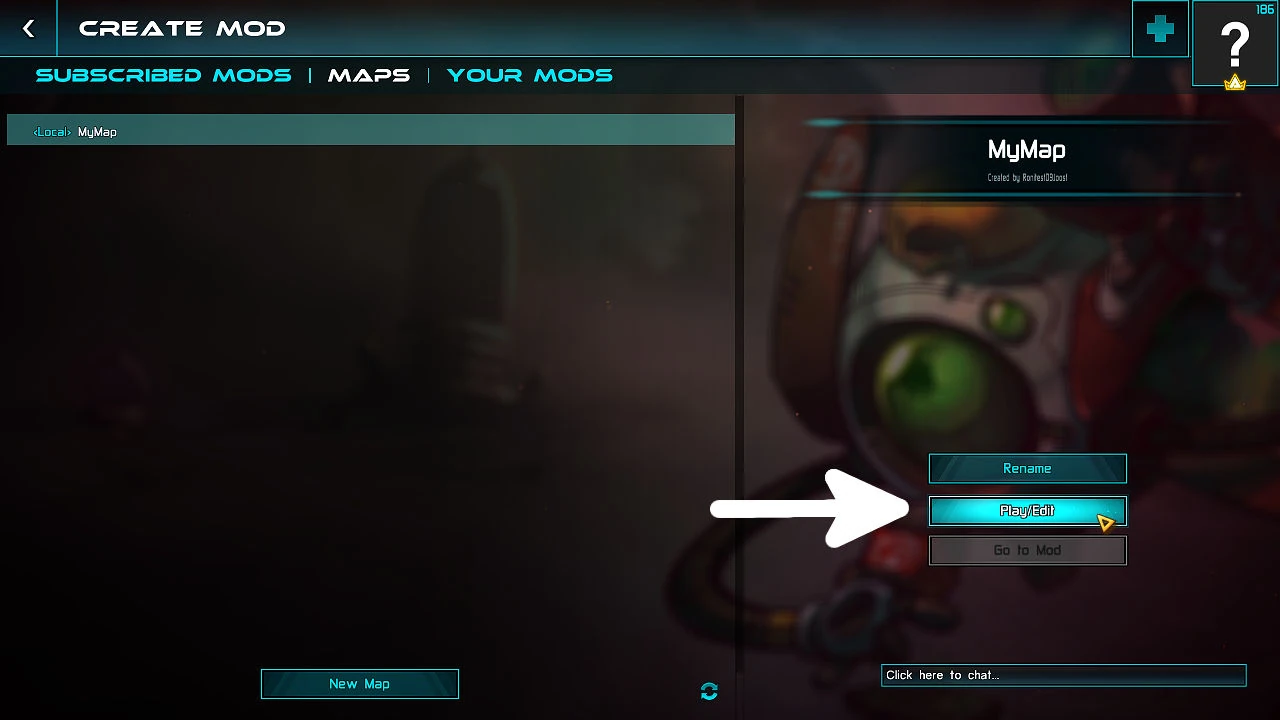
Now that we've made a new map we can start editing it. To start the map editor, click Play/Edit. In the popup you can select what Custom Game preset you want to use while editing. Just leave it on Awesomenauts for now and press Play.
Play while editing[ | ]
You can play your map while editing it. To unpause the game, press the play button and then use WASD to move your character. You can also close the map editor and go to normal gameplay by pressing F7. Press F7 again to go back to the map editor.
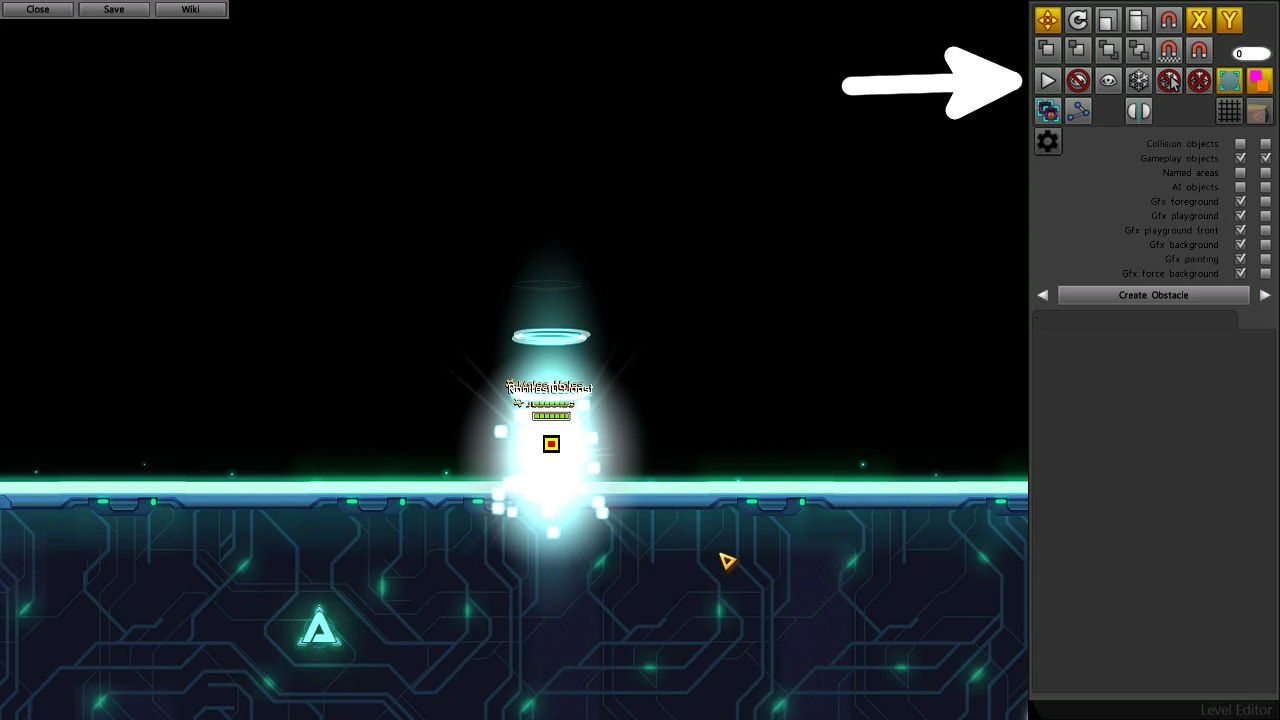
Camera controls[ | ]
In the map editor you can move the camera using the arrows on the keyboard, or by holding the mousewheel down and moving the mouse. You can zoom in/out by rotating the mousewheel, or using [ and ] on the keyboard.
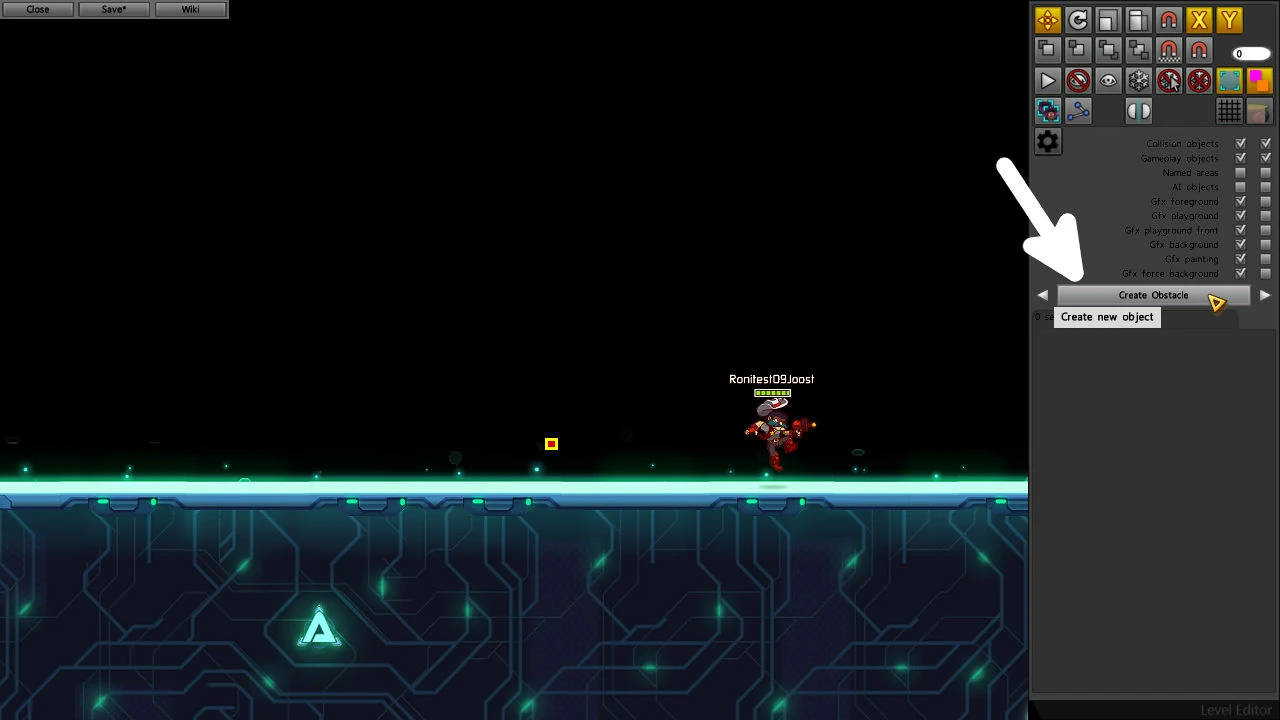
Creating a wall[ | ]
Walls are called Obstacles. To create one, press the big button that says Create Obstacle.
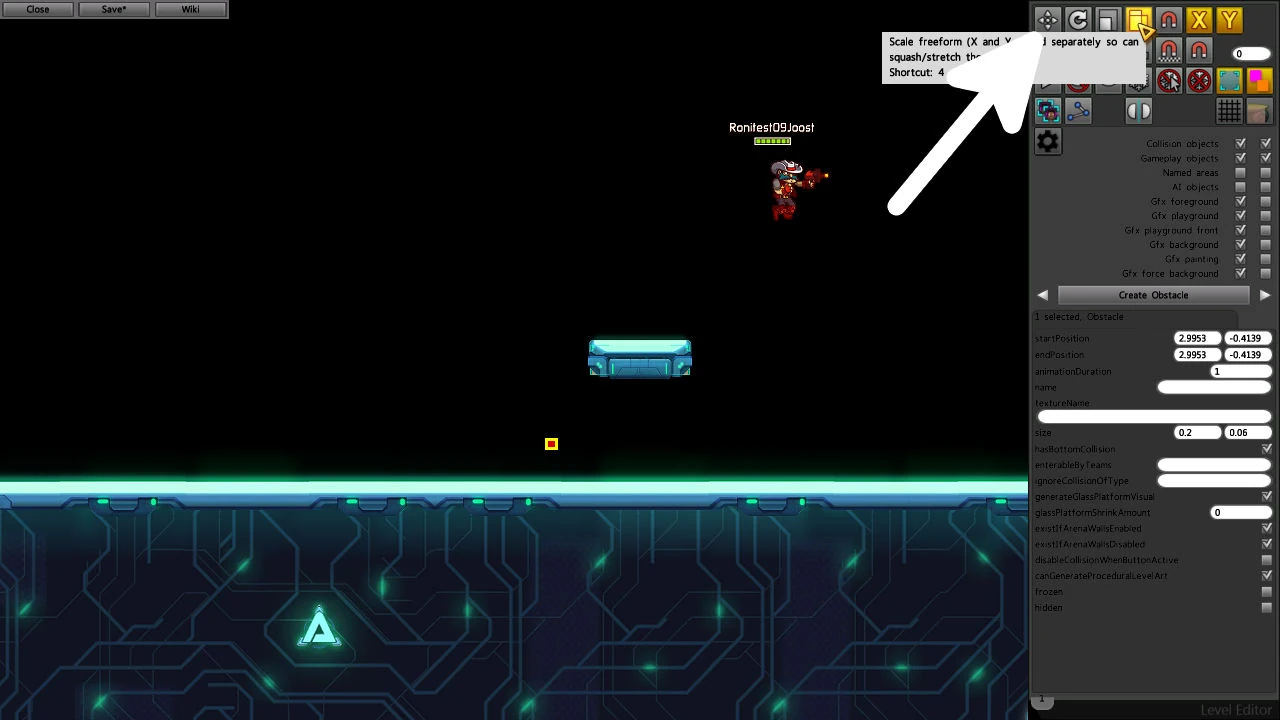
Moving objects[ | ]
You can select the Obstacle using the left mouse button. You can move it around using the right mouse button. click the scale button at the top right to go into scaling mode, and then use right mouse button to rescale the object.
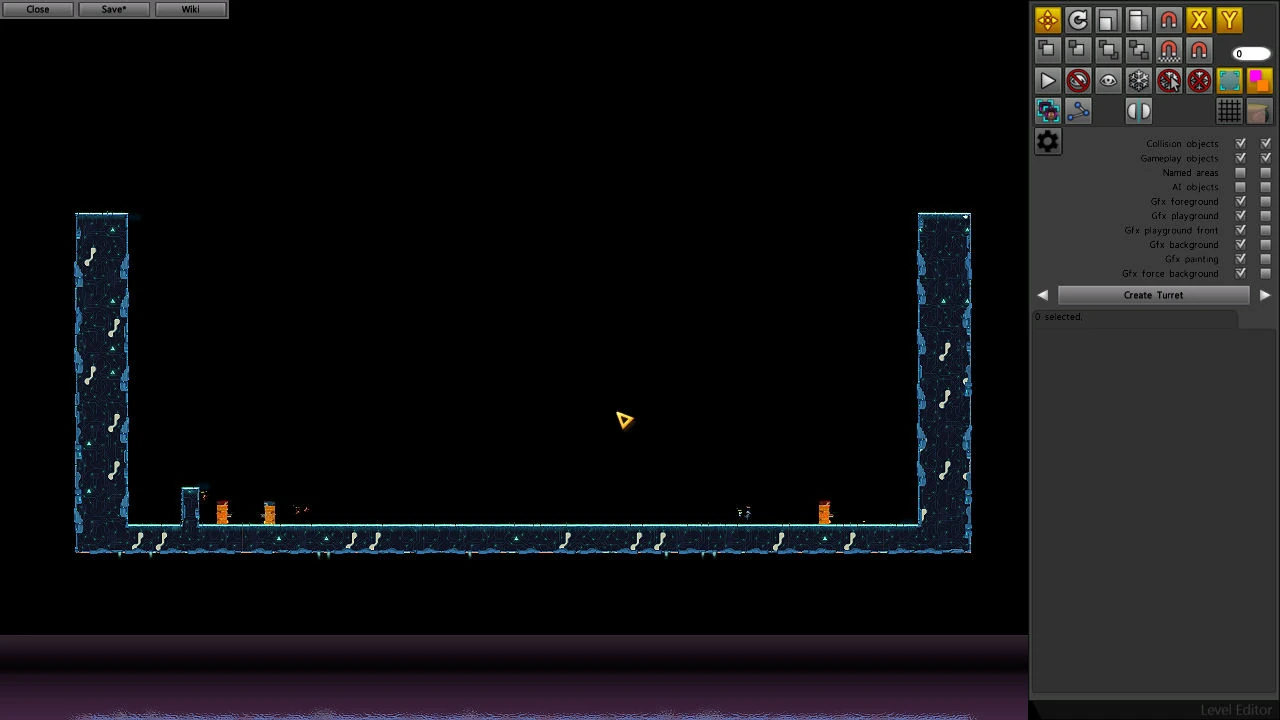
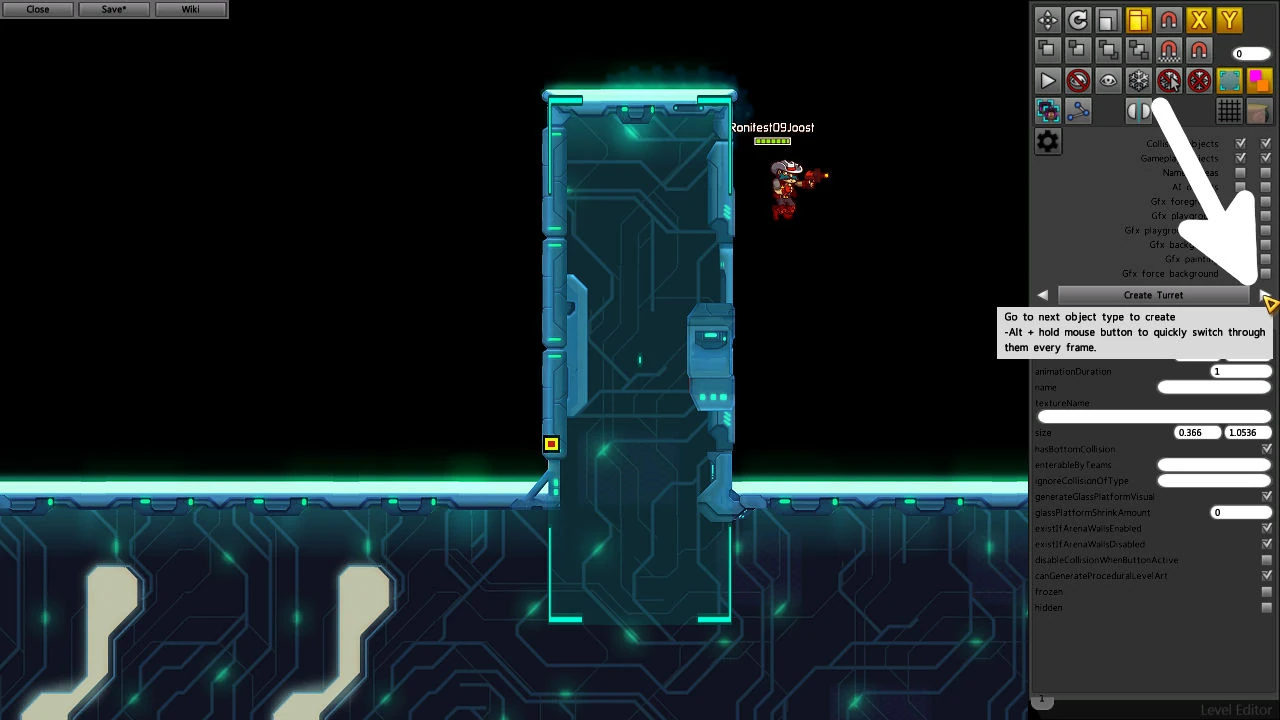
Creating a turret[ | ]
Use the arrow next to the create button to switch to Turret, and then click the button to create a red turret.
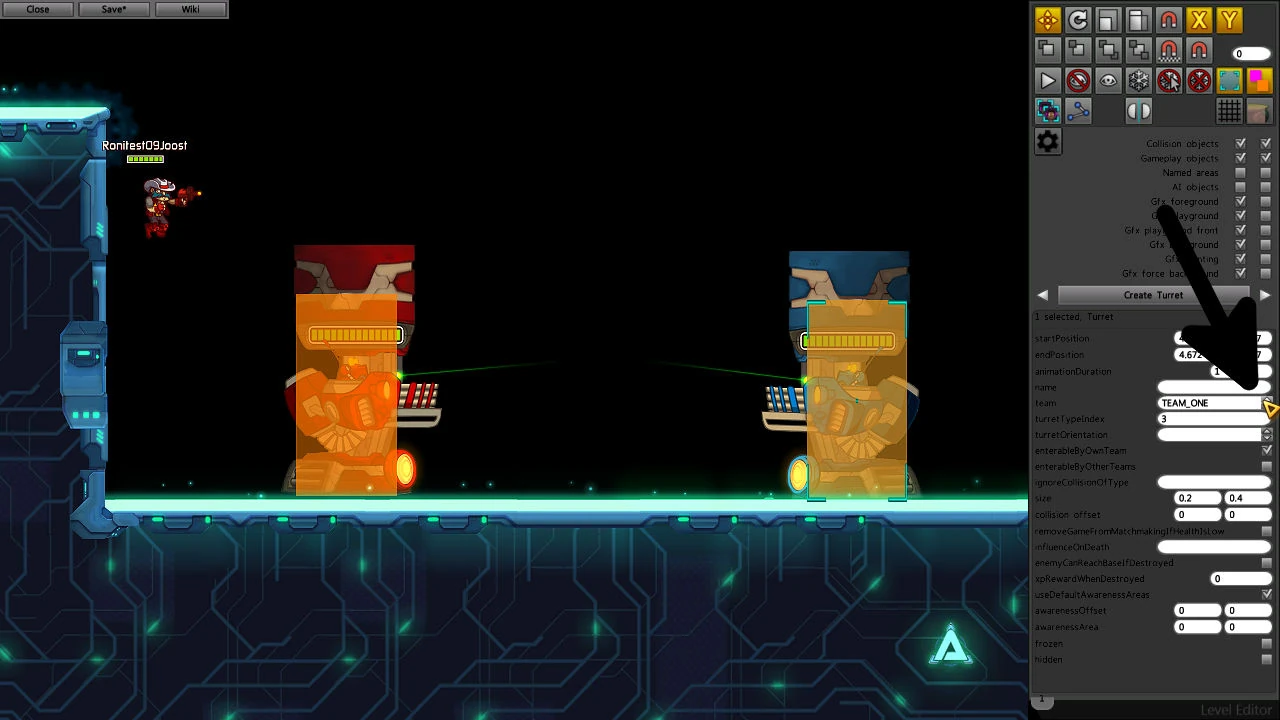
Copy/paste and creating a blue turret[ | ]
Select the turret and press CTRL+C to copy it. Then press CTRL+V to paste the turret somewhere else. To change the team of this new turret, select it and then press the little arrow next to TEAM_ZERO (red team) to switch to TEAM_ONE (blue team).
Save your map[ | ]
Press the save button in the top-left corner of the screen to save your map. You can also save using Ctrl+S. Next press Close and then quit the editing session by pressing Escape.

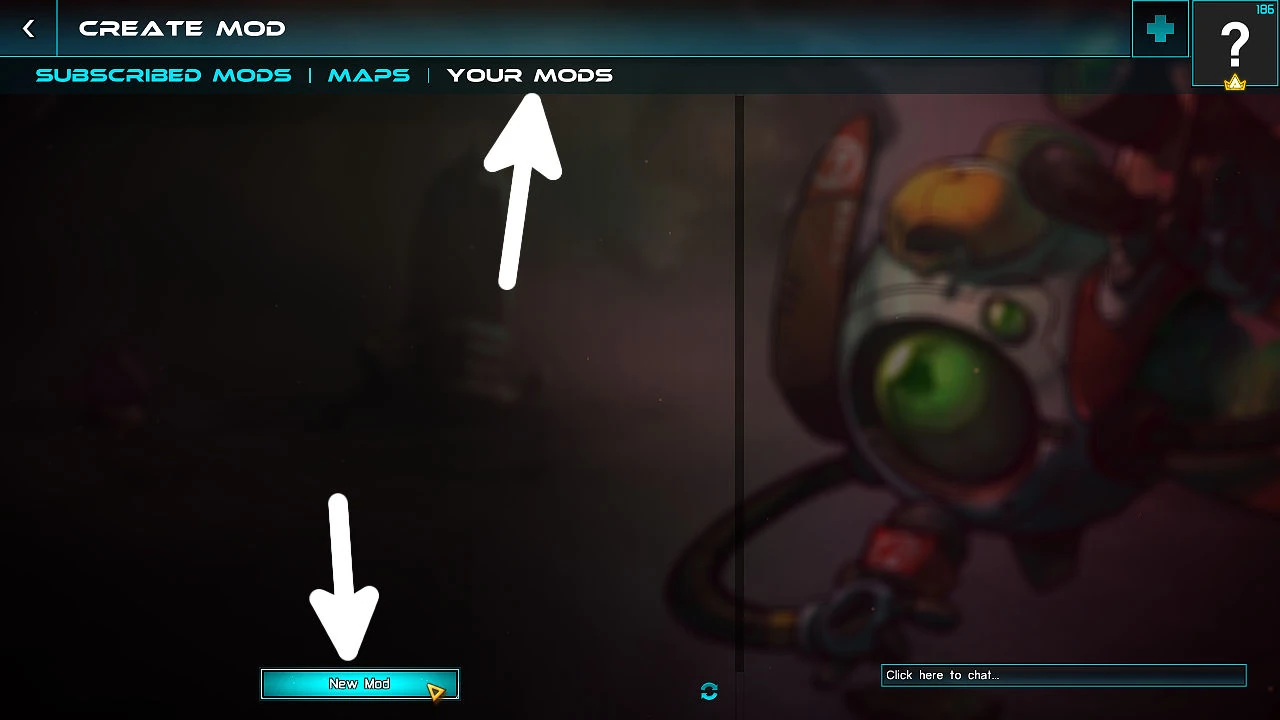
Making a mod[ | ]
Go to the modding menu again and this time go to the Your Mods tab and press the New Mod button.
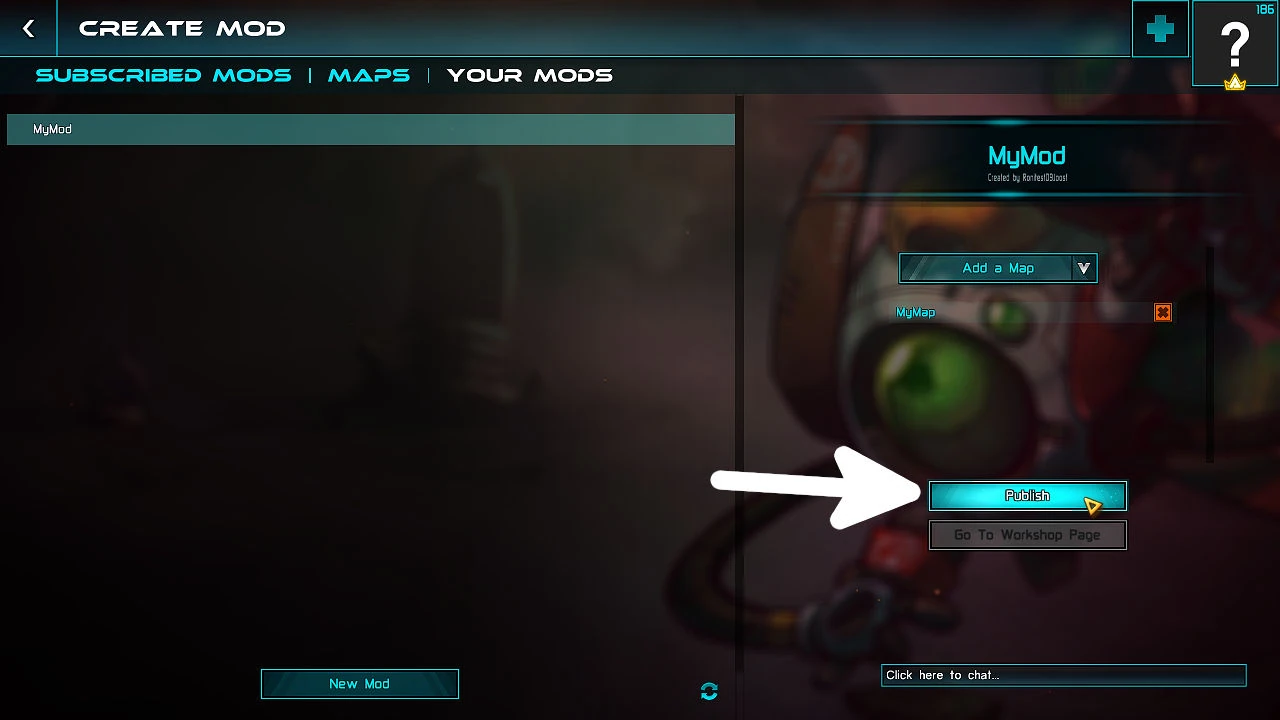
Put map in mod[ | ]
A mod can contain one or more maps but can also contain other things, like Custom Game presets and AIs. For now we're just going to put the map we just made in the mod. Also, type a name for your mod.

Publishing to Steam Workshop[ | ]
Next press the Publish button to upload your mod to Steam Workshop. Don't worry, the mod will be set to private for now so no one else can see it yet. A popup will open where you can setup the Workshop page for your mod. Here you can write a description, add images, see comments from players, and more. Once your mod is finished you can change the visibility to Public to let everyone find it.
Playing mods online[ | ]
Once a mod has been published you can find it in the maps list in the Custom Game screen. If someone joins your match who doesn't have the mod yet, he'll automatically download the mod. This also works for mods you didn't make yourself: just subscribe to any mods in the Steam Workshop menu and you'll see them appear here.
Note that if you make changes to your mod without publishing them, then the version of the map you play here is the old version of the map: only whatever is published appears here.
GG[ | ]
That's it, enjoy making mods! :D You can find more tips, tricks and a list of shortcuts in the Map Editor page on this wiki.